How to Get the Most Out of the Quilt/Craft Displays
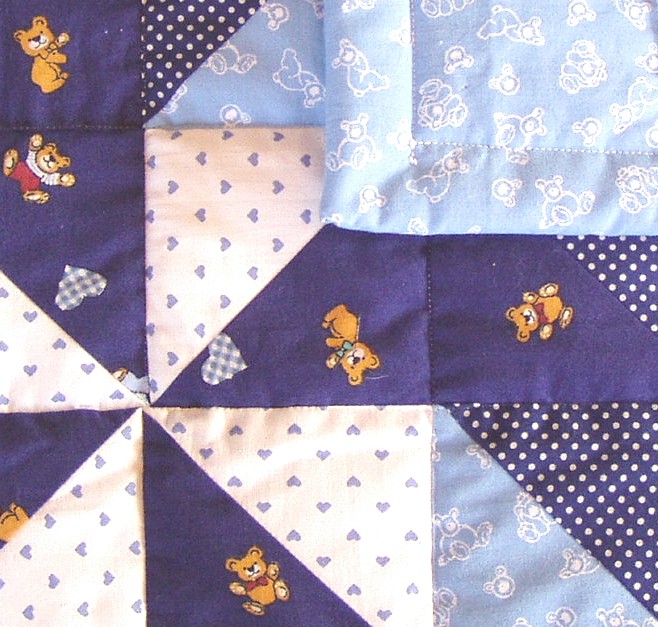
The best quilt and craft displays reward patient looking. If you have ever stood in front of a wall of quilts, stitched samplers, baskets, painted signs, or handmade textiles and wondered what you were missing, you are exactly the reader I had in mind.
What should you notice first? How do you tell a simple-looking piece from a technically difficult one? When is it appropriate to ask a question, and when is it better to step back and just look a little longer? Those are good questions, and they are the right place to begin.
I like to start with a simple rule: a display becomes much richer when you treat it as both an art gallery and a conversation. References such as Britannica’s overview of quilting and the Quilt Alliance show that quilts are not only decorative objects. They are records of technique, materials, memory, and community effort.
By the end of this guide, you will know how to read labels more confidently, spot the details that show skill, ask better questions, photograph respectfully, and support the people behind the work without getting in anyone’s way.
Quick Table of Contents
- How to Approach Displays
- What to Look For
- Questions to Ask Volunteers and Artists
- Photo Etiquette and Sharing Tips
- Supporting the Craft Community Responsibly
- Where to Find Display Hours
How to Approach Displays
The first thing I recommend is slowing down just enough to notice the structure of the display itself. A good quilt or craft display usually has a reason for the order in which things are placed. One section may show older works, another may show a theme, and another may group pieces by maker, style, or technique. If you read the labels before you read the room, the whole visit feels less like a blur and more like a guided walk.
Start with the label, not with the rush
Labels often tell you the essentials: who made the piece, what materials were used, what the title means, and whether the work is part of a larger project. That small amount of context can change the way you see everything. A plain-looking quilt may turn out to be the result of a community challenge, a memorial piece, or a carefully planned demonstration of a specific pattern.
If a display includes artist statements, event notes, or volunteer-written cards, read those too. They often explain the story behind the piece in language that feels warmer and more personal than a formal label. That is not extra decoration. It is part of the work.
Take your time in front of one piece
You do not need to hurry from item to item to “get your money’s worth” from a display. In fact, the opposite is often true. Standing with one quilt for a minute or two can reveal stitching rhythm, color balance, border choices, and repair work that you would miss in a quick pass. If children are with you, try a simple game: ask them to pick one shape, one color, and one detail they did not notice at first. It keeps them engaged without turning the visit into a lecture.
That slower pace also makes it easier to respect the space around each piece. Many quilts and handmade textiles are displayed so they can be seen clearly without touching. Think of your eyes as the main tool. Your hands can wait.
A practical way to read the room
Here is a simple approach I use when I want to enjoy a display without feeling overwhelmed:
- Pause at the entrance and notice the overall theme.
- Read one label fully before looking at the next piece.
- Pick one item and study it from a few feet away.
- Step closer and look for stitching, joins, edges, or surface texture.
- Ask one thoughtful question if a volunteer or maker is nearby.
That little routine is simple, but it keeps the visit calm. You are not trying to consume the display. You are learning how to see it.
What to Look For
The most satisfying part of a quilt or craft display is usually the moment when something small starts to make sense. A repeated shape, a tiny mismatched seam, an especially clean edge, or a bold fabric choice can tell you a lot about the maker’s style and the time involved.
Patterns and composition
Start by looking at the structure of the piece. Are the shapes repeated with strict symmetry, or do they shift a little from block to block? Does the design feel formal and balanced, or playful and improvisational? A display can teach you how many different ways there are to arrange the same basic materials.
In quilting especially, pattern names and visual traditions matter. A pattern may repeat a familiar block, borrow from family memory, or reflect a region or era of craft. The National Quilt Museum is a useful reminder of how much variety lives inside the category. Even when two pieces use the same general idea, the final result can feel completely different because of scale, color, or finishing choices.
Materials and their meaning
Materials are not just the raw ingredients of a craft piece. They are often part of the message. Cotton, wool, felt, ribbon, recycled fabric, embroidery thread, beads, paper, natural fibers, and hand-dyed cloth all carry different textures and visual moods. Some materials are chosen for durability. Others are chosen for the memory they carry. Others are chosen simply because the maker loved the color and wanted it to do something bright in the room.
If the label mentions donated fabric, recycled scraps, or family clothing, pay attention. Those materials can tell you that the piece is also a record of care and reuse. A display becomes richer when you notice not just what the object looks like, but what it came from.
Craftsmanship details that reward a closer look
This is where the real fun begins. Many visitors notice the overall design right away and assume the piece ends there. It rarely does. Look for seam lines, stitching density, border alignment, edge finishing, handwork versus machine work, and places where the maker solved a practical problem elegantly.
For example, a quilt may have tiny, even stitches that suggest remarkable patience. A craft piece may have a slightly irregular join that reveals a hand-built process rather than a factory one. A basket may show a deliberate change in weave tension to preserve shape. A stitched textile may show thread color choices that quietly echo a background block or border. These are the details that make a piece feel alive.
| What you notice | What it may tell you | A good question to ask |
|---|---|---|
| Very regular stitching | Care, practice, and time spent refining technique | “Was this hand-stitched, machine-stitched, or a mix of both?” |
| Scrap fabrics or reused materials | Resourcefulness, memory, or a story about family and community | “Do the materials have a story behind them?” |
| Bold color contrast | Design choices meant to create movement or highlight a theme | “What guided the color palette?” |
| Small imperfections | Handmade character and visible process | “Was the maker aiming for a traditional or improvisational style?” |
If you want a broader sense of how quilts function as both art and record, the Britannica article on quilting is a helpful companion read. It gives context without flattening the craft into a simple category.
Questions to Ask Volunteers and Artists
One of the nicest things about a quilt or craft display is that the people around it often want to talk about it. Volunteers know the practical details. Artists know the choices, the experiments, and the surprises. If you approach them with curiosity instead of interrogation, they will usually be happy to help.
Good questions open doors
Try questions that invite story, not just facts. “What inspired this piece?” is often better than “How long did it take?” because it gives the maker room to explain the idea behind the work. Time matters, of course, but inspiration and process tend to reveal more about the heart of the piece.
Here are a few questions that usually work well:
- “What should I notice first when I look at this piece?”
- “Were there any materials or patterns that shaped the final design?”
- “Was this made for a specific event, gift, or community purpose?”
- “Did the maker face any interesting challenges while creating it?”
- “Are there other pieces nearby that connect to this one?”
These questions are respectful because they assume the maker has something worth sharing. They also help you connect one piece to another, which is often how the whole display starts to feel less like a row of objects and more like a living conversation.
How to listen well
If someone answers your question, give them room to finish. Many volunteers and artists know when they are dealing with a sincere visitor. You do not need to mirror every detail back to them. A simple “That helps me understand it better” or “I would never have noticed that detail on my own” is enough. Good listening is part of good visiting.
If you are with a group, let one person ask while the others wait. It keeps the conversation relaxed and gives the person speaking a chance to answer without competing voices. That small courtesy helps everyone enjoy the display more.
When to step back
Not every piece has to become a discussion. If a volunteer seems busy, let them stay busy. If a maker is speaking with someone else, wait your turn or move on. Craft displays work best when visitors remember that the people on the other side of the table have a whole event to manage, not just the moment in front of them.
If you need follow-up information after the visit, a public contact path is often the cleanest next step. On this site, the contact page is the best place to start with questions that are better answered after the display.
Photo Etiquette and Sharing Tips
Photography can be a lovely way to remember a display, but it works best when it is done with permission and restraint. The main idea is simple: do not let the camera take over the visit. You are there to enjoy the work, not to replace the experience with a phone screen.
Always ask before photographing people or close-up work
If you want a photo that includes a person, a maker at work, or a close-up of a piece that may not be intended for casual copying, ask first. A quick “May I take a photo?” is usually enough. If the answer is no, respect it immediately and without fuss. That is not a rejection of you. It is just a boundary, and boundaries keep events pleasant.
Some displays allow photography of the room but not of individual works. Others allow photos only without flash. Others may have special limits for delicate pieces. Look for posted signs and follow them closely. If you are unsure, ask a volunteer before you start taking pictures.
Keep your sharing thoughtful
If you post photos later, credit the artist when you can. A simple caption with the maker’s name, if provided, is a good habit. If no name is listed, use the label details you were given or say that the piece was seen at the event. Avoid cropping out the context so aggressively that the work looks like a random decoration. The whole point of sharing is to help people appreciate the craft, not to detach it from the people who made it.
And if you are tempted to post ten nearly identical photos, consider posting three strong ones instead. One overall view, one detail shot, and one photo of the label or display context is often enough to tell the story well.
What not to do
- Do not use flash unless it is clearly allowed.
- Do not lean over ropes, tables, or barriers for a better angle.
- Do not touch the work to “fix” the lighting or the angle.
- Do not block other visitors while setting up a long photo session.
- Do not publish a photo if a maker or volunteer asked you not to share it.
That may sound strict, but it is really just the visitor version of care. Displays run more smoothly when people treat permission as part of the experience.
Supporting the Craft Community Responsibly
Enjoying a display is one thing. Supporting the people behind it is the step that makes the visit matter a little more. You do not have to buy something at every table, but it is worth thinking about how to keep the craft community strong.
Small purchases can mean a lot
If there is a raffle, a donation jar, a small shop, or handmade items for sale, consider whether one of them fits your budget. A modest purchase can help cover supplies, space, printing, or future programming. If the display is attached to a local group or fundraiser, that support may go directly back into community work.
If you are not buying, you can still support the effort by signing up for updates, taking a brochure, or telling a friend about what you saw. The craft world grows through attention as much as through transactions.
Share artists and events the right way
When you post about a display, name the event if it is public and mention the artists when they are identified. That gives credit where it belongs and helps other people find the work later. If the display has an official website or event page, linking to it is even better than reposting a blurry photo with no context.
If you want to see more community programming on this site, start with the festival events page. It is the easiest place to look for related gatherings, activities, and updates without having to dig through the rest of the site.
For organizers who keep volunteer notes, display checklists, or post-event follow-up in one place, a web app generator can be a practical way to sketch that workflow before building anything more formal.
Notice the hidden labor
One thing visitors sometimes miss is the amount of labor that happens before a display opens. Someone sorts the pieces. Someone writes labels. Someone checks hanging hardware, lighting, spacing, and placement. Someone answers visitor questions all day. Someone returns everything to storage later. None of that shows up in the final photo, but it is part of what you are admiring.
That is why a thank-you matters. A short word of appreciation to a volunteer, artist, or organizer is not ornamental. It is one of the most useful forms of support a visitor can offer.
Where to Find Display Hours
I will be careful here: exact hours can change, and I do not want to hand you a number that goes stale. The safest habit is to check the official event page, the venue listing, or the latest post from the organizers before you go.
On this site, the best starting points are the festival events page and the home page. If you do not see the details you need, the contact page is the right next step. That way you are working from current information instead of memory.
If the display is part of a larger community event, local listings and organizer announcements can also help. Just make sure you are looking at the most recent update before you leave home. A short check ahead of time saves a surprising amount of frustration later.
A Simple Checklist for Your Visit
- Read the labels before moving on.
- Pick one or two pieces and study their details slowly.
- Ask a volunteer or artist one thoughtful question.
- Follow photo rules and ask before shooting people or close-up work.
- Support the event if you can through a purchase, donation, or share.
- Check the official page for hours before you travel.
Closing Thoughts
Quilt and craft displays are not meant to be rushed. They are meant to be noticed. The more attention you give to labels, materials, stitching, and the people explaining the work, the more the display gives back.
If you remember nothing else, remember this: read the context, look for the hands behind the work, ask respectful questions, and treat photography as a courtesy rather than a right. Those habits make you a better visitor, and they make the whole room a little kinder.
And if you want the shortest possible version of the advice, it is this: look closely, ask gently, share carefully, and support generously.